This is the final article in my adventure design series. Over a year ago, I put out a call on social media for ideas that people wanted me to include in the series. I guess my list of ideas (the previous 11 articles) was comprehensive enough because I only received one idea from Michael Morton, and his request was for me to write an article about node-based design when it comes to adventures.
Many articles have been written on this very in-depth topic. Because there are so many ideas packed into this single topic, I’m barely going to scratch the surface. Given that this is a high-level overview of how to approach node-based design, I’ll link off to other resources at the end of this article.
The Basics
At a high level, node-based design is breaking your story into distinct elements, locations, encounters, and/or NPCs the PCs will interact with. Each node represents a scene that plays out and leads to the next node (or set of nodes if the PCs have a decision to make). If you design a scene that has no “next steps” outcome for the PCs, then you need to circle back to your adventure design and figure out why the node is a dead end. After all, if it’s not the last node in the design, there needs to be forward movement in the storyline the PCs are following and telling along with you.
Why Node-Based Design?
This approach is highly effective when there is a powerful mystery element to the story. The PCs will start with one major question (the story hook) that will lead them down pathways between nodes that will open up more questions, answer some previous questions, and guide them to wanting to find answers for the new queries that have arisen. If, at any point, the PCs run out of questions to answer or mysterious elements to explore/discover, then they’ve missed something, information wasn’t presented properly, or the adventure’s design failed to expose those new questions to the party.
This approach can also be used when there are increasingly powerful and more organized opponents in the way. As obstacles increase in potency, the PCs will be working their way up the “food chain” of bosses and their mooks. The Night’s Black Agents approach of the Conspyramid is a great and classic example of how node-based design can be applied to a whole series of bosses, lieutenants, mooks, and other NPCs the party will encounter throughout the story.
Previous Article: Back to Front or Top to Bottom
When detailing your nodes, I suggest you start at the last node the PCs will encounter and work your way toward the opening scene (node). This will help you keep your ideas organized and allow you to place the proper clues. If you haven’t designed node #3, it is more difficult to put the proper clues in place in node #2 to guide the PCs to traverse to the proper node.
Also, if you have a bifurcating pathway through your nodes, this will allow you to properly sprinkle in the right clues and rumors to allow the PCs to make educated decisions about which pathway to follow through the nodes.
For more detailed information about designing “back to front,” check out this article in the series.
Previous Articles: The Meat of Each Node
My articles on Story Hooks, Thematic Environments, Thematic Bosses, Thematic Mooks, Supporting and Opposing NPCs, and Clues, Rumors, and Connective Tissue all apply on how to build each individual node. Many elements from one node can bleed to the next, or they can remain entirely distinct from one another. How you approach building each node is entirely up to you, but I recommend that the flow between themes in the nodes make sense to the players as they guide their characters between each node. Don’t suddenly jump from a romantic node to a horror-themed node unless the “logical exit” from the romance is somehow horrific in nature.
Railroad vs. Player Decisions
Many people view a single line of nodes as a railroad situation. This can be true, so be careful in how you present each node, each node’s exit, and what comes in the next node. Railroading, at its most base level, is removing or negating PC agency. If they can’t make decisions or their decisions always lead from A to B to C regardless of what they do, this is most likely railroading. This is why I recommend avoiding linear node-based design.
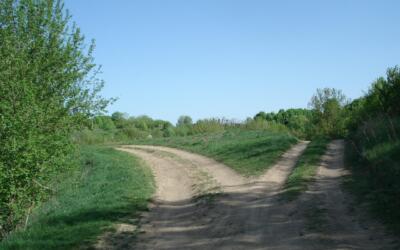
Instead, go with nodes that have multiple exits to allow for PC decisions to matter. Each set of clues can lead to decisions down different paths the PCs might want to take. Yes, this will increase the load on your adventure design efforts as you may create nodes that are never visited. That’s perfectly fine, but be aware of this. This awareness will prevent you from spending extraordinary time on nodes that might be skipped.
While I’m thinking about linear design and decisions, I do recommend that the first 2-4 nodes be linear in nature. This will allow for the story to gain momentum, be a guided experience, and get the players accustomed to their characters, your GMing style, each other player’s play styles, and so on. It lowers the mental effort needed from the players if they don’t have many decisions to make. Keep these nodes small and brief if possible, though.
Chokepoints
If you have a key node (remember nodes are scenes) that must happen during the course of the story, don’t allow the PCs to choose pathways that bypass this key node. Bring them back to what is called a “chokepoint” in the story. If node 5 can lead to one of nodes numbered 6, 7, or 8, but you need them to encounter something or someone in a latter node, then each of those three paths will focus in on bringing the PCs to the chokepoint, so they must pass through node 12 at a later time.
Floating Clues and Information
Another option to chokepoints is to “float” your clues or information. Don’t lock down information that is absolutely necessary to a single node or location. If the PCs happen to bypass or miss the vital node, then they will miss out on critical information that will play a part later in the game. An option is to “float” your clues, rumors, and information in a manner where they can be dropped into almost any logical node where the PCs are currently having a scene. This is akin to the “quantum ogre,” but it’s in the benefit of the party and the story to ensure the information they need will be encountered at the proper time.
Other Resources
Here are those resources I mentioned that I’d link to:
- The Alexandrian: Node-Based Scenario Design
- Halfway Station 3.0: Conspyramids and Vampyramids
- The Bardic Inquiry: I Tried Node-Based Design in my Mystery TTRPG Campaign, Here is What I Learned
Conclusion
I hope this brief overview of node-based design helped you out. Thanks to Michael for the suggestion. I would have never thought of this topic on my own!
Series Conclusion
I hope you had a great time in this year long exploration of adventure design. I learned quite a bit coming up with the detailed thoughts for each article, and I hope you learned along with me. This has been quite the experience for me, and I greatly enjoyed the entire process and adventure that we’ve gone on together.
This all started as I got to my man-child’s bus stop too early and had time to kill. This entire series almost leaped from my forehead fully formed in just a manner of seconds. Fortunately, I keep a pen, pencil, and notepad in my center console. I snagged the pen and paper and hastily scribbled down ideas. The funny thing is, I was still scratching out ideas when the bus arrived, and my son had to wait on me to finish capturing my thoughts before I drove him home. That’s okay. He knows I’m a writer and is used to waiting a little bit for me as I finish jotting notes that capture my ideas.


